This knowledge base article provides a guide on how to Design A Simple Sign with step by step instructions. If you follow this guide you’ll see we use each of the builder tabs to create elements. Once you have completed the design you can print it onto a film sheet and assemble the sign.
Design A Door Plaque
For this article we are going to design the Door Plaque shown below using LG Signs. Remember this article uses screenshots, the colours you see may not be those that are printed.

Prepare Images
Before we start, we have to create and save 2 images for our sign. If you’re going to build this sign yourself, simply right click the 2 images below and save them locally.
First up is a Green Star we will use for the tiled background. This is simply a 100px star in a 150px transparent box, we saved as a PGN image. By having the small star in a larger box, it automatically creates space when it’s tiled.

Second image is our feature image, for this we’re using a Baby Panda. Once again this is a transparent PNG, so you can use it on a coloured background. Our panda is 530x728px, which means we will have to resize it once it’s added to the sign.

Set Sign Size
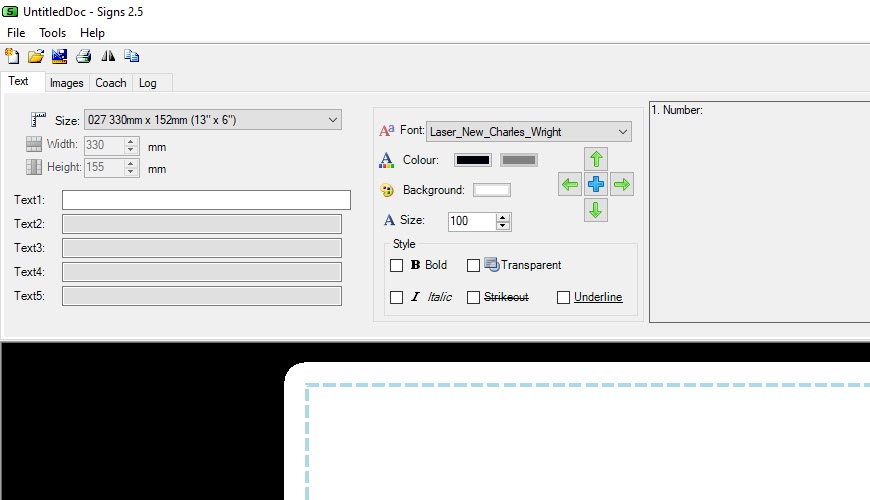
Now we have our images ready we can start to build the door plaque, so start up LG Signs. For our sign we have decided to use our Short Plate components, because the 330x152mm is perfect. So select the Text Tab on the builder and pick the 027 330x152mm from the dropdown.
Add a Background Colour
After setting our sign size the next step is to set a background colour. As you can no doubt see already, we’re building this sign from the bottom up. To add the background we need to add a coach line and then convert it into a box. So click the Coach Tab on the builder and follow the steps listed below.
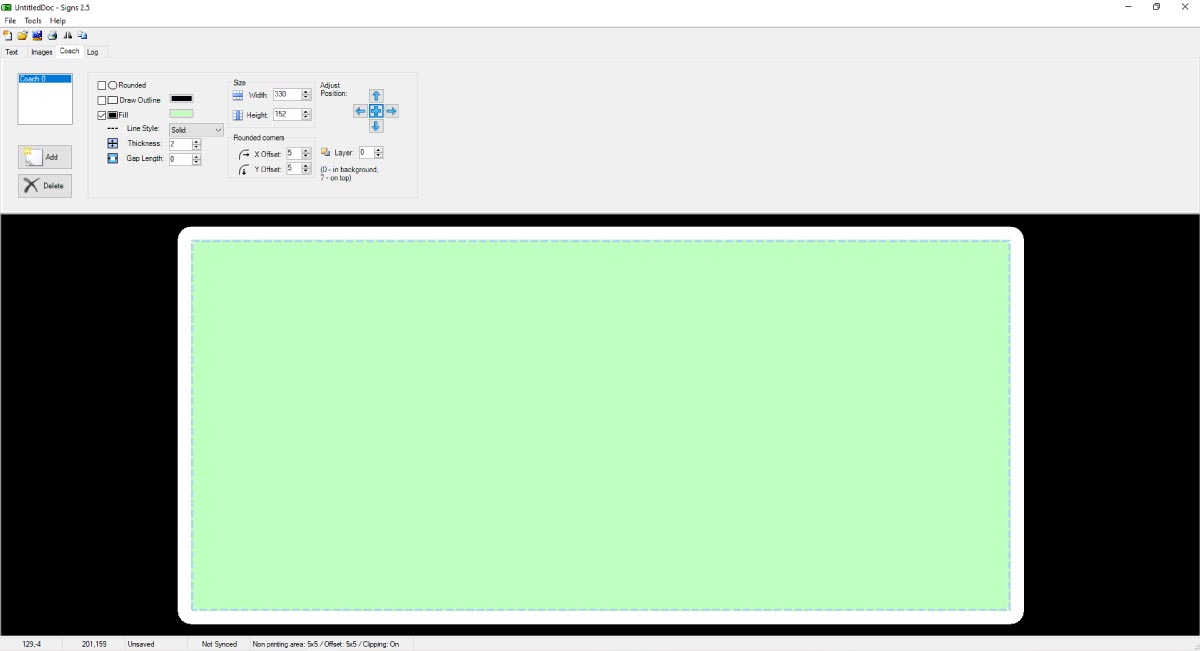
- 1: Click the Add button for a new coach line.
- 2: Untick the Rounded and Draw Outline checkbox’s to remove the outline.
- 3: Add a light green Fill colour of 191/255/191 in RGB.
- 4: Finally you should Centre and Resize it to 330×152 so it covers all the printable area.
Add the Background Image
Next we are going to add the star background image to our sign as seen in the screenshot below. For this we need to be on the Images Tab of the builder. After inserting the image we have to centre, resize and tile it. Then get it into place so our stars are all whole.
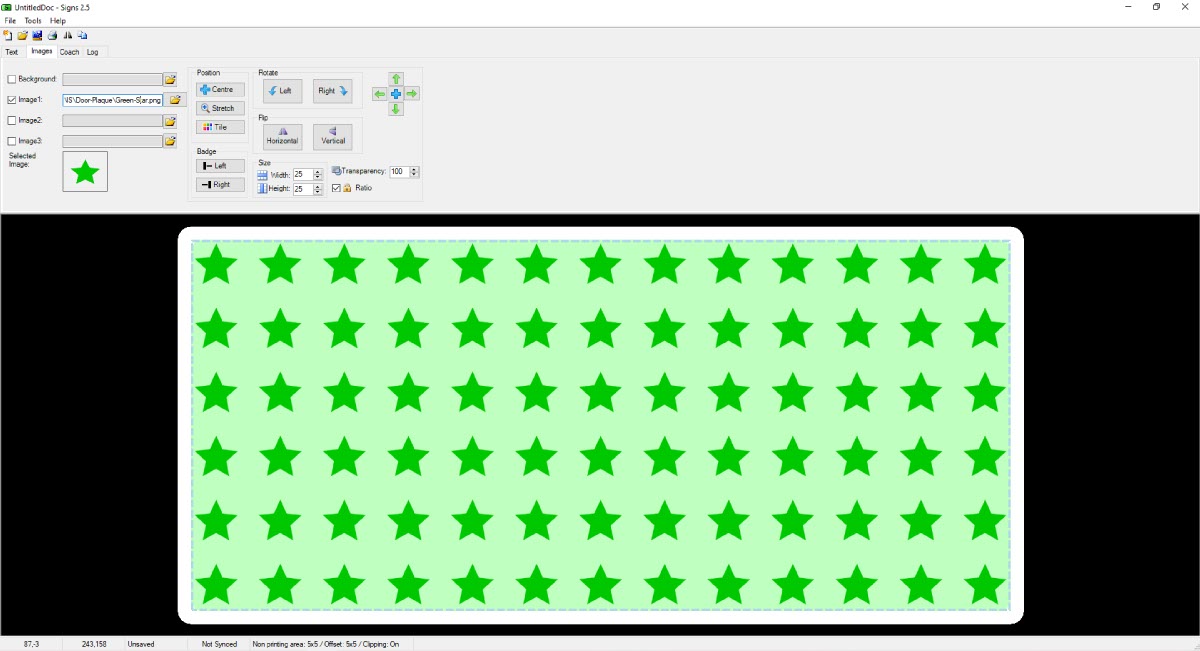
- 1: Tick the Image 1 checkbox and then add the Green Star PNG into the sign.
- 2: Now use the Centre button before you resize it to 25x25mm.
- 3: We need to Tile the image next, so it fills the entire background.
- 4: Last step is to get the stars into place, all we had to do is click the down arrow a few times.
Create a Name Plate
The next element of our sign is a Name Plate, this box will be used to contain the Text. For this we will be going back to the Coach Tab and adding another box. But this time we will use rounded corners, an outline and applying a fill colour. Not to mention, positioning it on the right hand side.
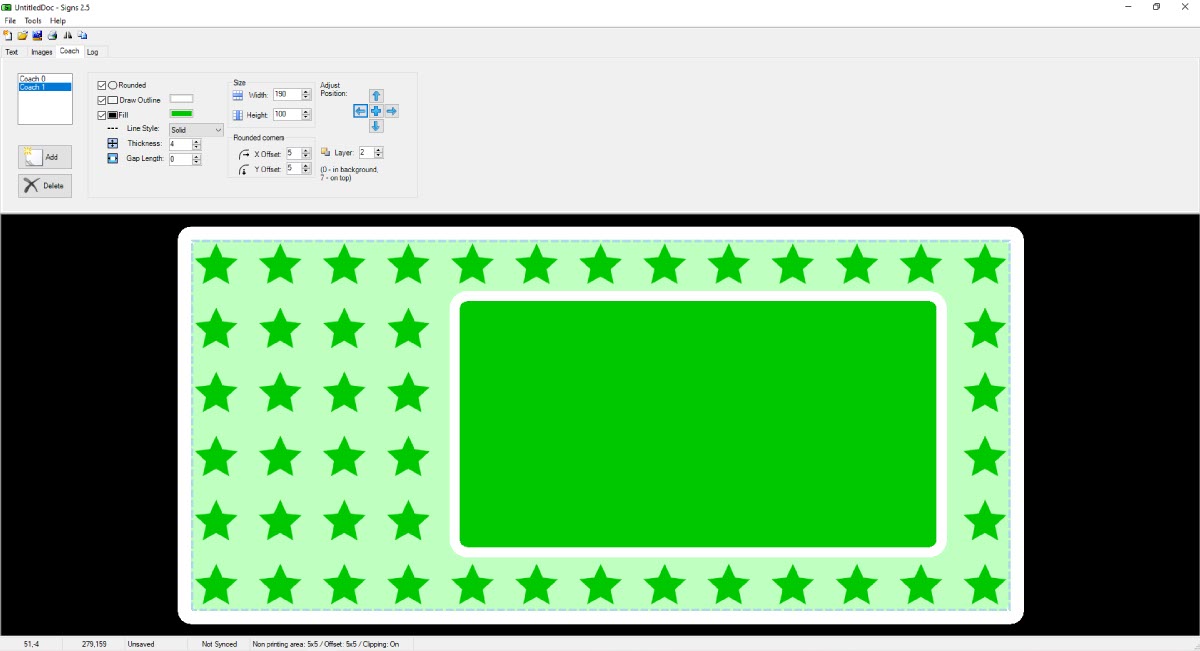
- 1: Click the Add button for a new coach line, this will be named Coach 1.
- 2: Tick both the Rounded and Draw Outline checkbox’s this time but set the Gap to 0.
- 3: Next you want to select White for the outlines colour and a Thickness of 4mm.
- 4: Add a Mid green Fill colour of 0/200/0 in RGB.
- 5: Now set its Size to 190x100mm and Centre it using the button.
- 6: Because the Stars are shown above it you need to set its Layer to 2.
- 7: Finally position it on the right hand sign, try to get it so no partial stars are showing.
Add the Feature Image
It’s now time to insert our feature image – the Baby Panda. So we need to go back the the Image Tab for the last time. But all we need to do this time, is resize and then position it like the picture below.
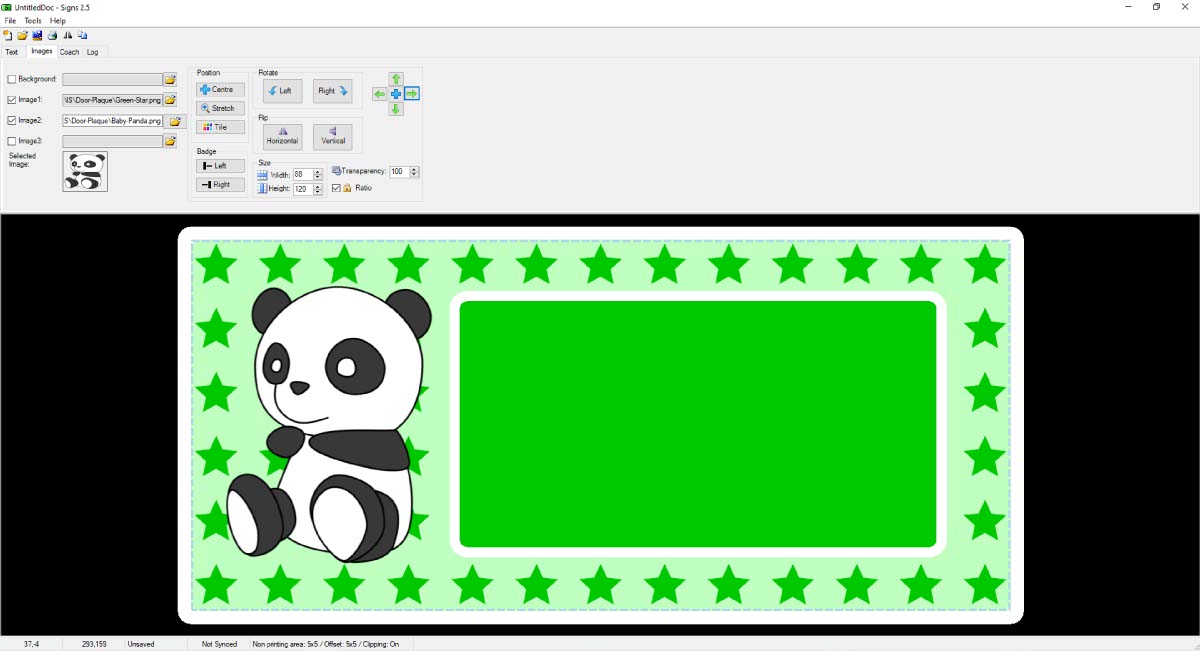
- 1: Tick the Image 2 checkbox and then add the Baby Panda PNG into the sign.
- 2: Now use the Badge Left button, which centres and places it on the left hand side.
- 3: Next just resize the image so its just bigger than your name plate, we used 88x120mm.
- 4: Then use the position controls to put it in the middle of the gap between the edge and name plate.
Enter a Name
To finish up we just need to enter a name and put it into place. For this you need to use the Text Tab, type in a name and style it. And then position it in the middle of the Name Plate.
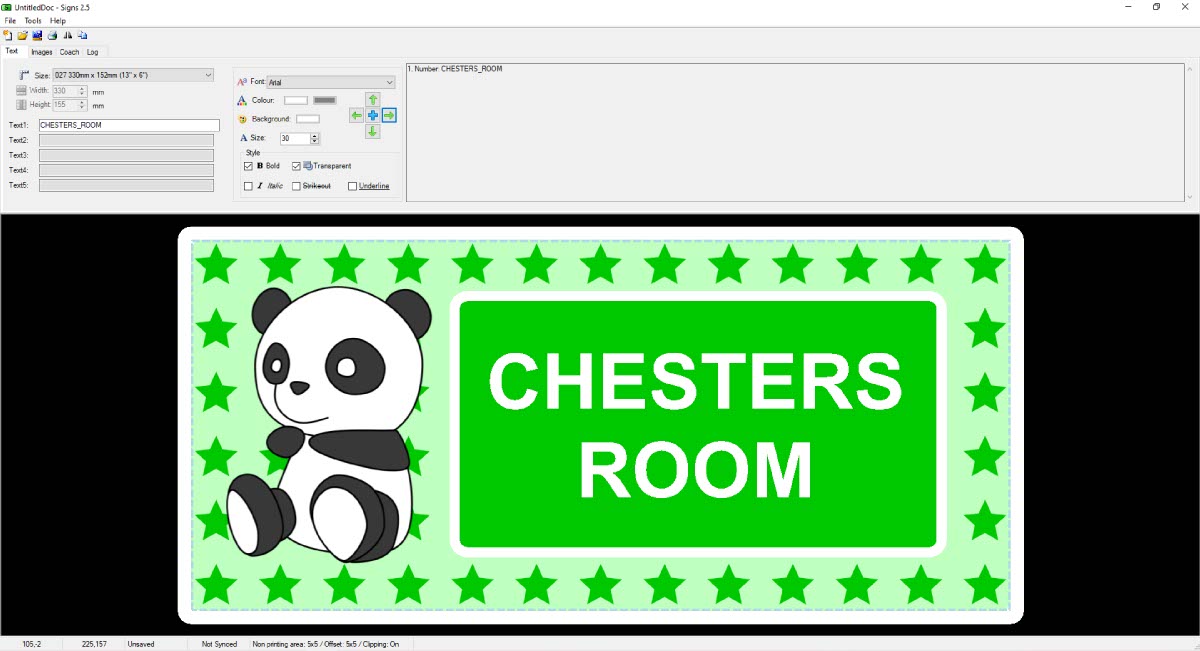 1: Use Text 1 and type a Name, you can see above we used an underscore_ to create a line break.
- 2: Now style your Text, we used Arial and set a White font colour.
- 3: Using the font options we picked Bold and the Transparent setting to remove its background.
- 4: All that’s left is to set it’s Size to 30mm and move it into the middle of the green Name Plate.
Save & Print
And that’s it, our simple Door Plaque design is finished. All that’s left is to save it as a Template or print it out on film and assemble the sign. We hope this article helps you become familiar with LG Signs options. It’s a nice simple application that supports both our printers and plate media components. But has none of the compliancy restrictions of our Number Plate software.