When designing a number plate you may wish to use a Insert a Bottom Line Logo into it, showing you are its supplier. This knowledge base article provides a simple guide on how to do this.
To design a number plate just make your way through the plates builder, setting up each element one-by-one. This article covers the second item, the supplier identifier. Once you have finished entering your settings, save it as a template for future use.
Plates Builder – Bottom Line Logo
An outlet, supplier identifier or Bottom Tag Line is a requirement of a legal number plate. To be standards compliant, it must be on the plate to identify who supplied it. So you’ll need to use your DVLA registered name and postcode.
This article shows how to add your identifier as an image, but you can always use Tag Line Text instead.
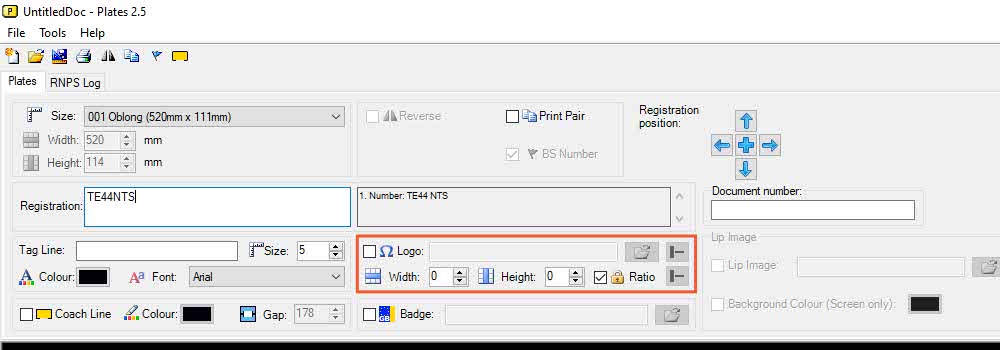
Our Plates builder houses all the controls you need to enter a supplier image, highlighted on the picture above. You can see it sits right next to the Tag Line Text. And it contains options for you to insert a picture, alter its size and tweak its position.
Insert Bottom Line Logo Image
For your supplier bottom line, you’ll need an image making up. It will need to be no bigger than 178mm x 10mm, but at least 3mm high. When using a picture with a custom font or effects, you need to make sure the supplier name is still identifiable. More details on the standards requirements for supplier images can be seen at the bottom of this article.
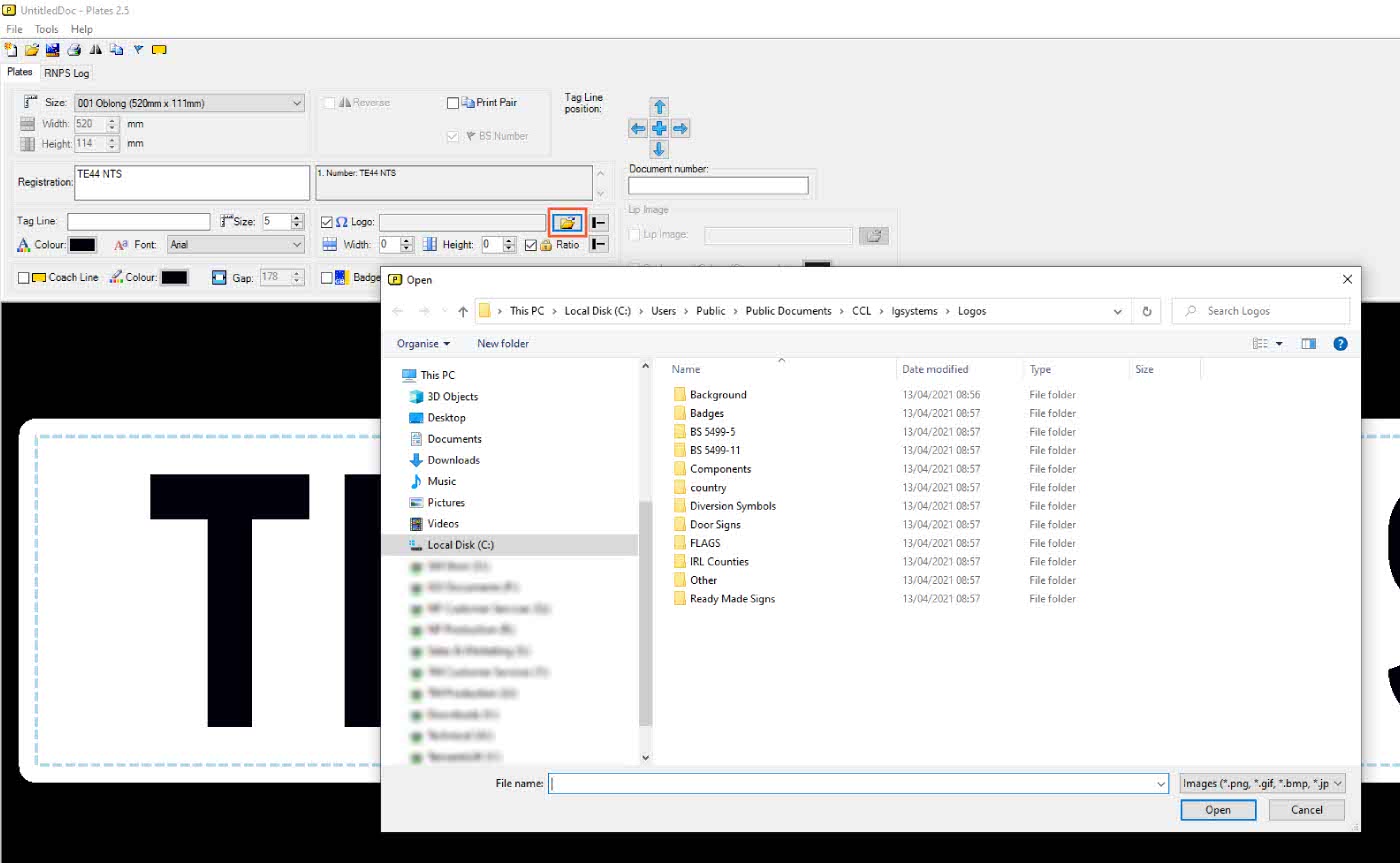
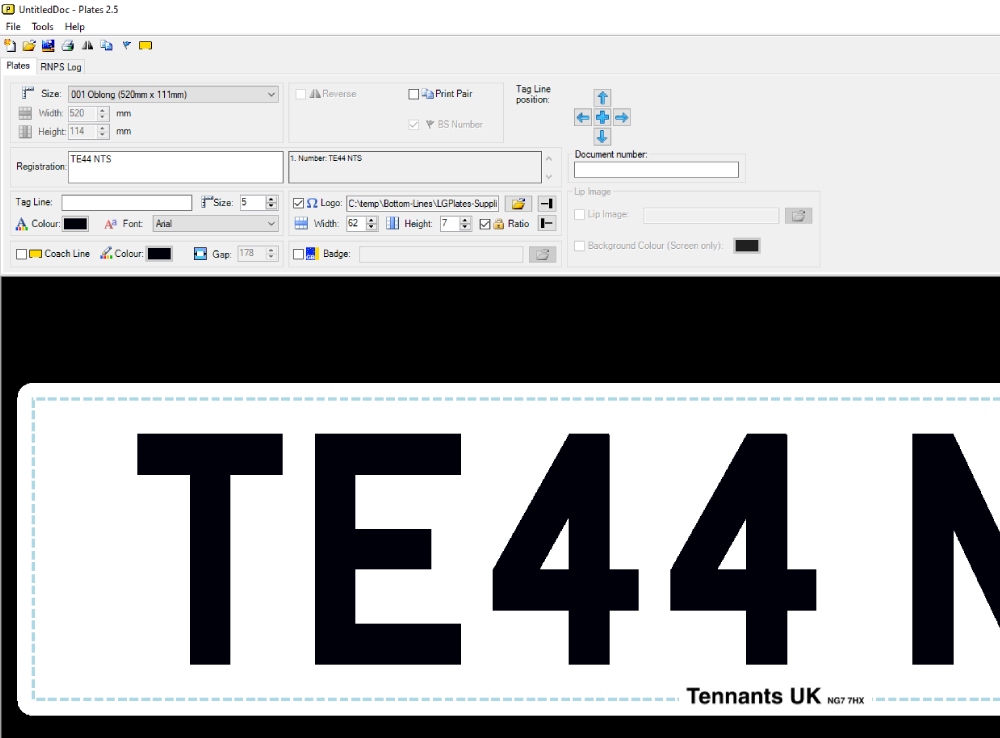
To insert your image, start by selecting the tick box in the logo section and then click the Browse Folder icon. This will open up the module for you to browse and select your picture. Similar to the Files Explorer in Windows, you can look at all the drives and devices connected to your PC. So locate your bottom line, select it and then click the Open button. You should now see it placed into the plate design.
Set Image Size
To help you fine tune your images size, the section includes some simple controls. If your image is to small or big, you can alter its width and height as desired. The Ratio function keeps the images proportions the same when you resize. Simply click the up and down arrows until you are satisfied.
Adjust Image Position
By default your picture will be aligned to the left of the supplier area when first inserted. Adjust it by clicking the horizontal or vertical position controls. To help you, a tool-tip appears if you hover your curser over both the controls.
The top box alters the pictures horizontal alignment, you can select a left or right alignment. Below that is the vertical alignment box, so you can pick from top, bottom or centre. For best results combine any adjustments you make with the size controls.
Then when you’re happy, you can move on to setting up any extra plate options.
BS Standards & Regulations
BSAU145e tweaked the supplier identifier rules to make it easier to read. And so they don’t interfere with the readability of the registration number. Now it can only be a single solid colour and must be at least 3mm high. As well as keeping to within a maximum area of 178mm wide by 10mm high.
In addition it must include your supplier name and postcode as registered with the DVLA. Custom fonts and effects are allowed as long as the supplier name is identifiable. And your supplier identifier image must obey all these rules to comply.
If you design a bottom line yourself, we suggest you save it as a PNG or Gif with a transparent background. For a high-quality print, we recommend it have a dots or pixel per inch of 150 to 300.


