When building a number plate you may wish to Add a Coach Line to it, to customise the design. This knowledge base article provides a simple guide on how to do this in LG Plates.
To design a number plate just make your way through our plates builder, setting up each element one-by-one. This article covers one of the extra plate options, the coach line or border.
Plates Builder – Coach Line
A Coach Line or border is not a requirement of a legal number plate. But it is one of the plate options, which allow you to customise a design. Whilst not a required element, it still has to meet the standards rules and regulations.
Because of BSAU145e changes, not all plate sizes can fit a coach line on it and remain compliant. So we have added new Large Oblong, Square and Motorcycle sizes to our software and components. Ordinarily if it isn’t showing in the plate preview, it isn’t a compatible size.
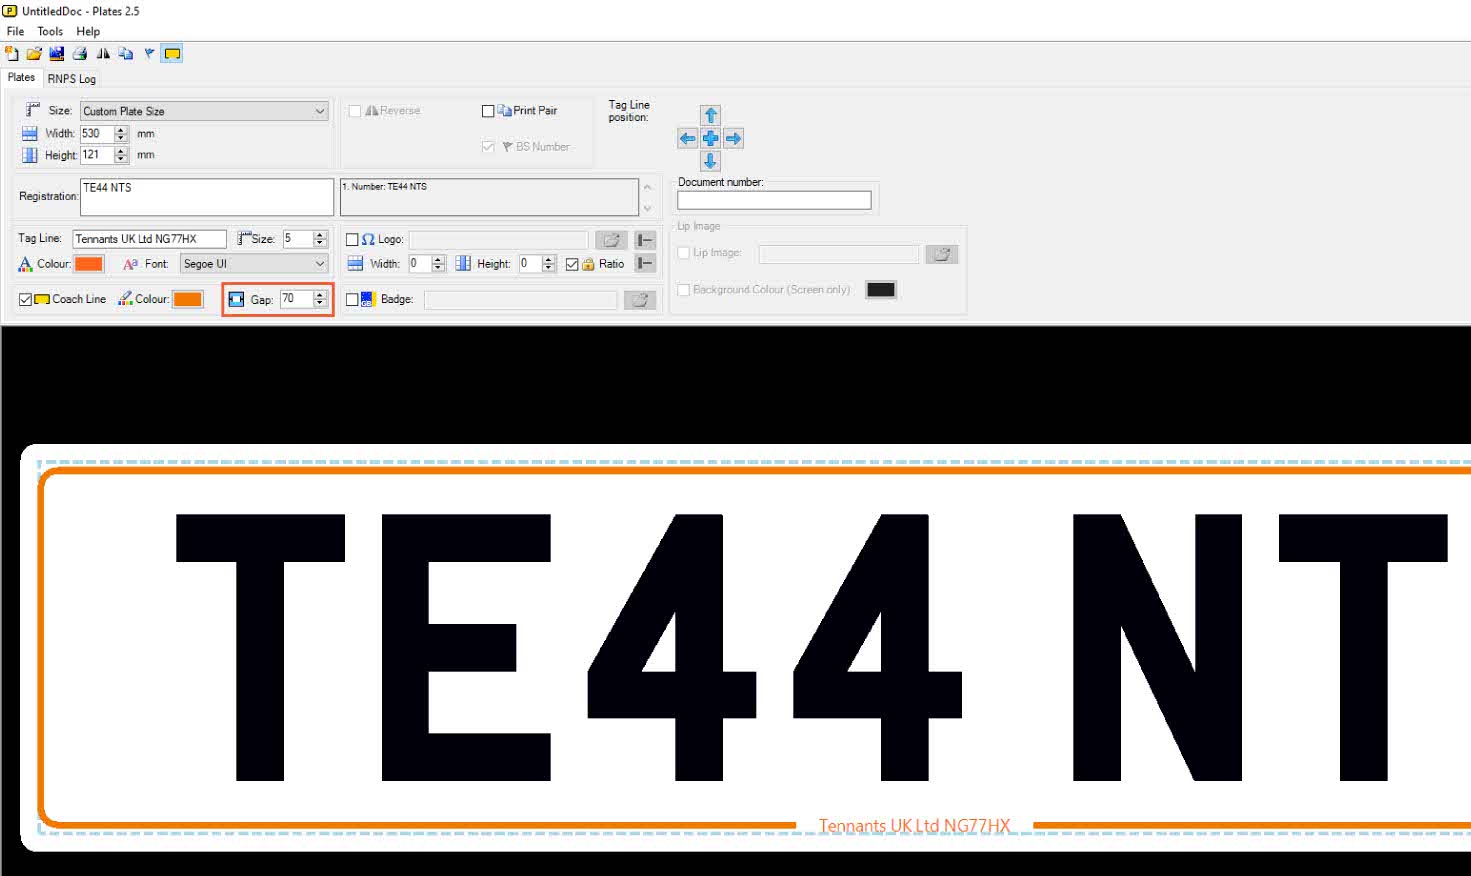
Our Plates builder holds all the controls you need to add a Coach Line, highlighted on the image above. You can see it sits right below the Tag Line Text section. And it contains options for you to turn it on, choose its colour and tweak its centre gap.
Add Coach Line
To insert a coach line, your first step is to select its tick box. This will activate it within the software. And the plate preview window will update to show it on your design. But by default it is black in colour and has the max gap of 178mm. So now you need to ensure you tweak it to fit your supplier identifier.
Pick A Colour
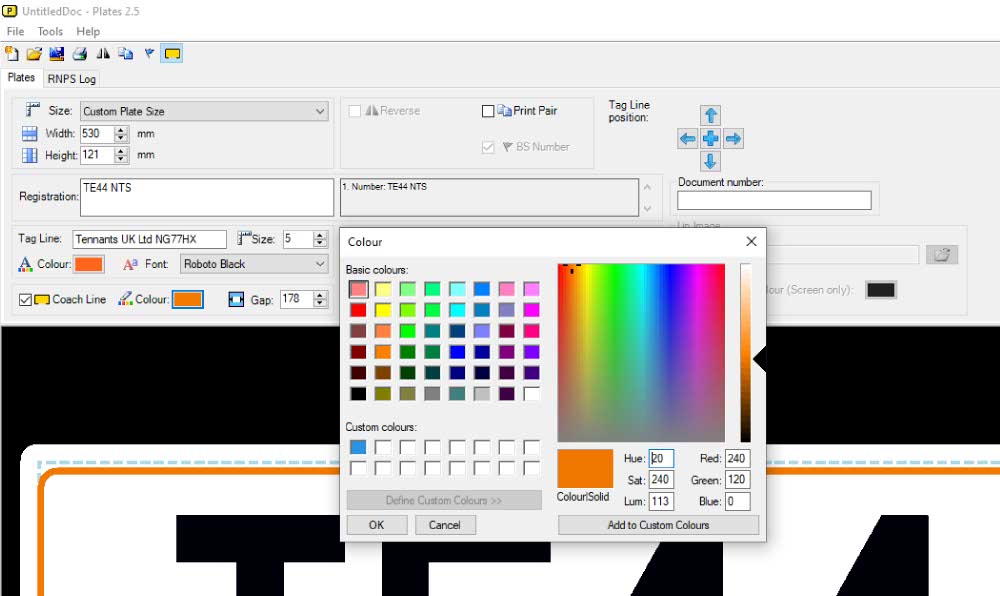
To change its Colour, click the box highlighted above to reveal the palette tools. You can use the pre-set range or create your own colour. By clicking the Define Custom Colours button, the palette is expanded with a selector and RGB fields. Use these tools to create a custom colour which can be added to the basic palette for future use.
Select or create a colour and press the OK button when satisfied. The border should now change from black to match your chosen colour.
Set the Centre Gap
By default it will also have a 178mm Gap in the middle. This centre gap is for your supplier identifier Tag Line or Bottom Line Logo image. So you should tweak its size to match your bottom line.
To change the gap, you can enter a new number into the box. Or use the up and down arrows to alter the existing figure. Check the preview window to see how it fits your chosen supplier text or image.
Then when you’re happy, you can move on to setting up any other extra plate options you want.
BS Standards & Regulations
BSAU145e standards tweaked the rules to make number plates easier to read by ANPR Cameras. This means the exclusion area around the registration has increased. Now any coach line must be a minimum of 10mm away from the Registration. Moreover it can only be one single solid colour and up to 5mm thick.
To accommodate this change, we’ve altered our software and created new large plate sizes. So when added to a design your coach line will be set a default width of 2mm. And it will be positioned outside the registration exclusion zone.
The line is inserted into a design with two gaps, one adjustable gap for your bottom line image or text. And one pre-set gap for the legally required BS Number. Remember to adjust the centre gap so it doesn’t interfere with the readability of your supplier identifier.


