Replace CLS700 Ribbon
This knowledge base article shows you how to replace the CLS700 ribbon and winding core within this thermal number plate printer. Below you’ll find the method for fitting our approved ribbons, which are outside wound or ink out ribbons. Instructions that follow assume you are directly facing the front of the machine.
Your printer works by winding a ribbon around its print head, so a fresh area can be used for printing. For this to work, your ribbon is fitted to a cardboard core and then mounted onto plastic holders. It then winds up your used ribbon using those holders, until its time to replace it.
Remove Used Ribbon
Start by taking your used ribbon off the print unit
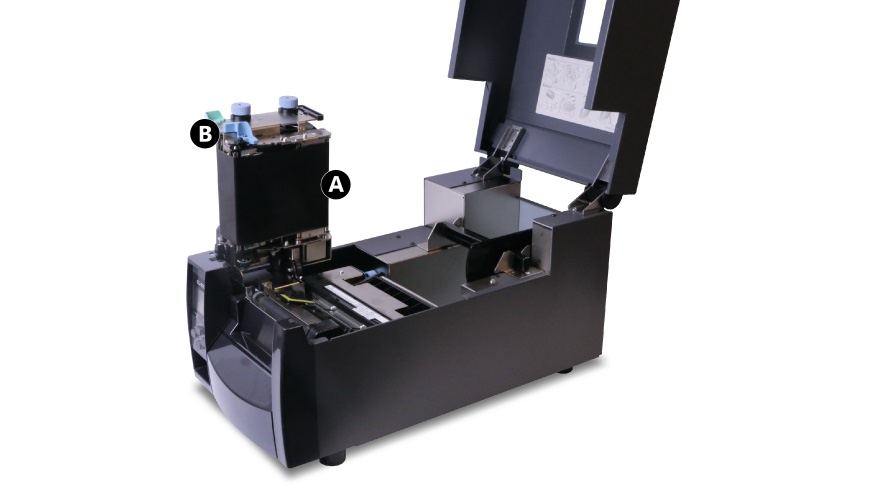
Before you can install a new ribbon, you’ll have to remove the used one. So lift up your printers top cover and raise the print unit (A) by pushing the blue lever (B). Keep the sensor arm lowered so it is easier for you to access the ribbon.
To remove the ribbon, take the plastic ribbon holders off the print unit. Simply lift the end with the blue knob up out of the cradle and pull the other side off the notch. Next pull the cardboard cores off the plastic holders and put them aside. And strip the ribbon off the carboard cores too, so you can re-use one.
Mount Your Ribbon

Ribbon Cores are mounted onto the holders
Now you can mount up your new ribbon so it’s ready to be fitted into the printer. One of the holders needs to be fully inserted into the ribbon and one into a cardboard core. The ribbon will run from the top, backwards and under the print unit. The plastic holders have a blue knob on one end and a hole on the other. Along their length is a series of splines which engage with the cores to hold them in place.
Fit the Ribbon Core

Fit the ribbon core into the rear cradle on the print unit
Load up the new ribbon and its holder into the rear drive on the print unit, the front drive is for winding. Line up the end with the hole, with the notch on the print unit. Push it onto the notch and then push the other side down into the black plastic cradle. Next you need to attach the ribbon to the winding core and then fit it into the print unit.
Fit the Winding Core

Pull the ribbon down and under the print unit

Tape the ribbon to the winding core & place it into the front cradle

Diagram showing the ribbon path
Before you fit the winding core, you need to attach your ribbon to it. Pull out some of the ribbon out and pull it back, down and under the print unit. Using some adhesive tape, stick the ribbon onto the cardboard winding core – like the image below. Try to keep the ribbon smooth and wrinkle free, and now fit it into the empty drive.
Just like before, line up the notch with the holder and then push the other side down into the black cradle. Ensure you are using the same ribbon path as shown in the image below.
Remove Wrinkles & Creases

Remember to remove any wrinkles from the ribbon
Once the ribbon and winding core are fitted, you need to smooth out any wrinkles in it. Start on the winding side and rotate the blue knob backwards and forwards. Simply jiggle it to remove any slack and wrinkles from the exposed ribbon. Repeat with the ribbon side if required until all your wrinkles have gone.
Lower Print Unit & Configure

Refit your reflective roll and lower the print unit
Finish setting up by lowering the print unit until it locks into place. Turn on your printer and then push the feed button on the control panel once. This will tighten your ribbon up and test that it has been replaced correctly.
If its required perform any ribbon tension adjustments and media width alignment adjustments now. And for the best print performance, we recommend you check or fit a new ribbon before starting a production run. Not to mention cleaning your print head and main feed path surfaces.
Need Help or a New Ribbon?
For more instructions on ribbons, try your number plate system’s user guide. Or for assistance contact our customer service team for help. And you can order replacement CLS700 Consumables from our online NP-Shop. There we list black ribbons and reflective rolls alongside head cleaning pens and alcohol wipes.