Install CLS621 External Roll Feed
This knowledge base article shows you how to Install the CLS621 External Roll Feed on your Core XL Systems. Using an external feed allows you to use large rolls, which means even less user intervention. And this gives you even more time to setup and assemble plates. Although to be effective this means using a two printer setup, thus producing front and rear plates.
Video Guide
 Load Reflective Roll – YouTube Popup
Remove the Top Cover
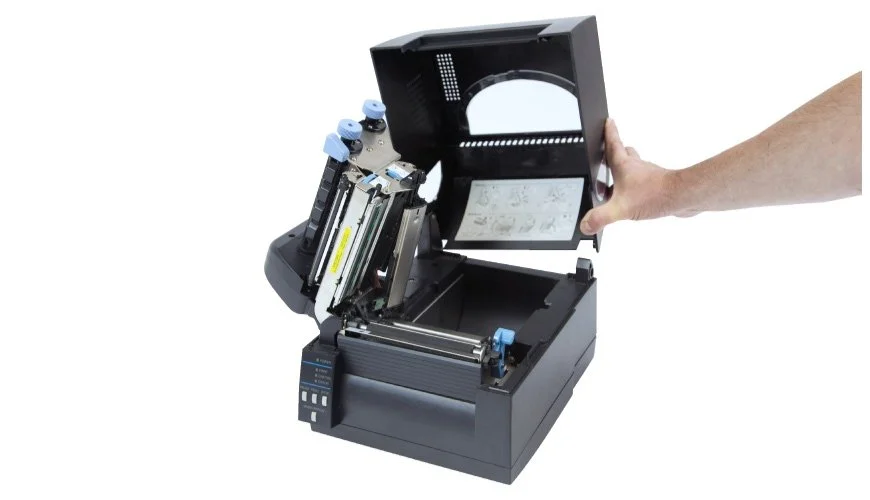
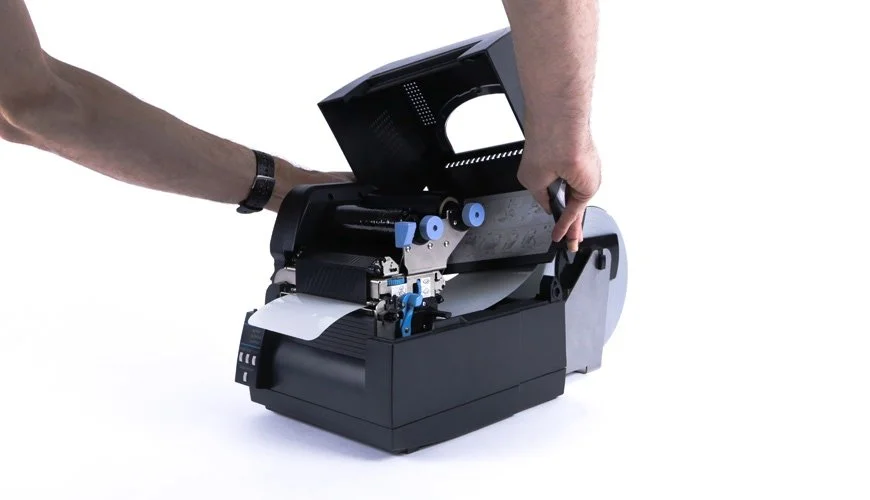
Before you can install the CLS621 external roll feed you need to move the cover, print unit and sensor out of your way. Start with your printers top cover, fully open it up and then pull it out its brackets and place it aside. Once the feed is fitted the cover will be replaced.
Lift Print Unit & Sensor Arm
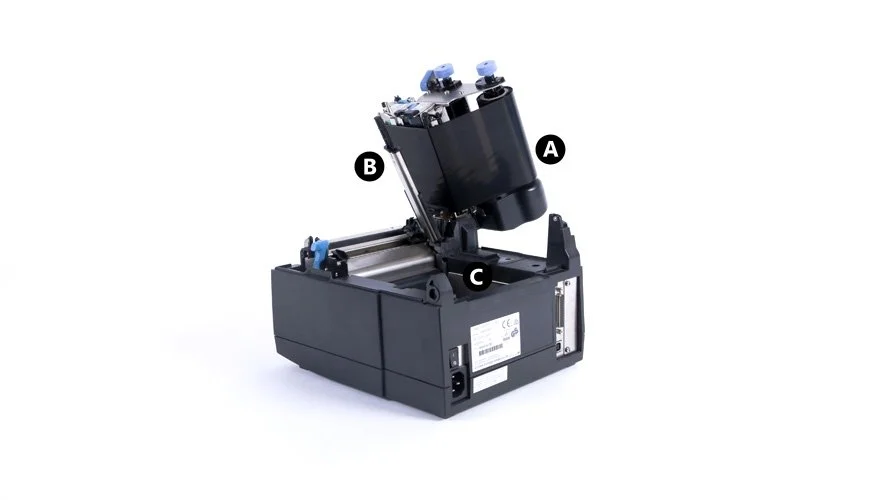
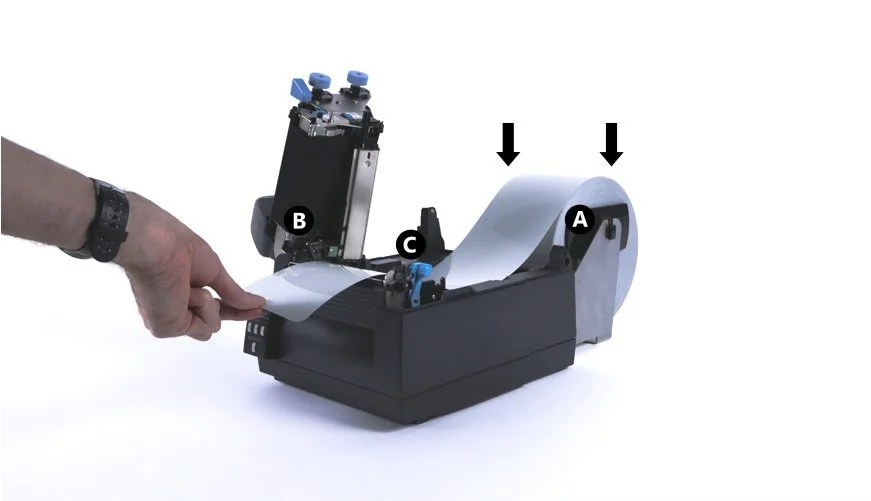
Next lift the print unit and sensor arm up out of your way. To release the print unit (A) and ribbon holder, push the large headed blue lever and lift it all the way up. Once the print unit is out of the way, you can simply lift up the sensor arm (B). This reveals the internal roll feed recess (C), where the media bar is stored unless it’s been used. Take it out and put it aside for later use with the external feed.
Fit the Roll Holder
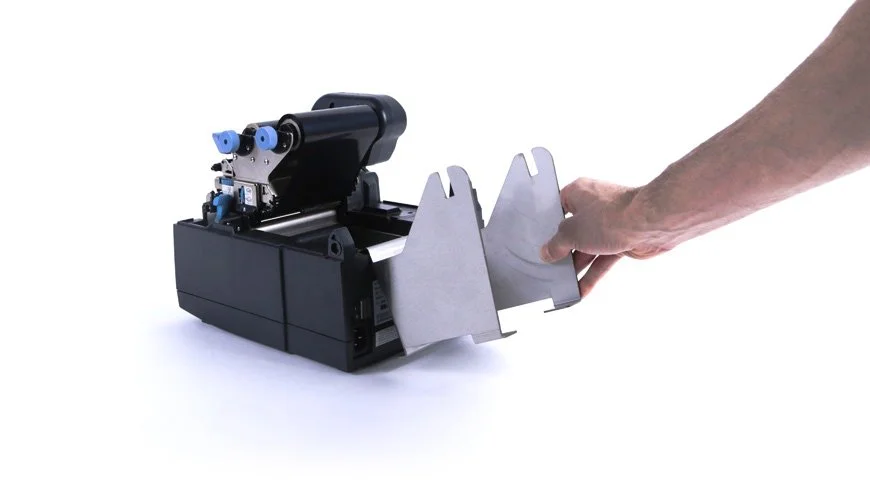
Now with those obstructions out of the way, it’s time to fit your external roll feed. Which consists of two parts, a roll holder and the media bar. Begin by fitting the roll holder onto the rear of your printer.
Take hold of the roll holder and insert its bracket onto the lip at the rear of the printer unit. It should just fit over the lip, hook it on and then lower it down to put it into place. Next step is loading up the media bar with your roll of reflective.
Load The Media Bar
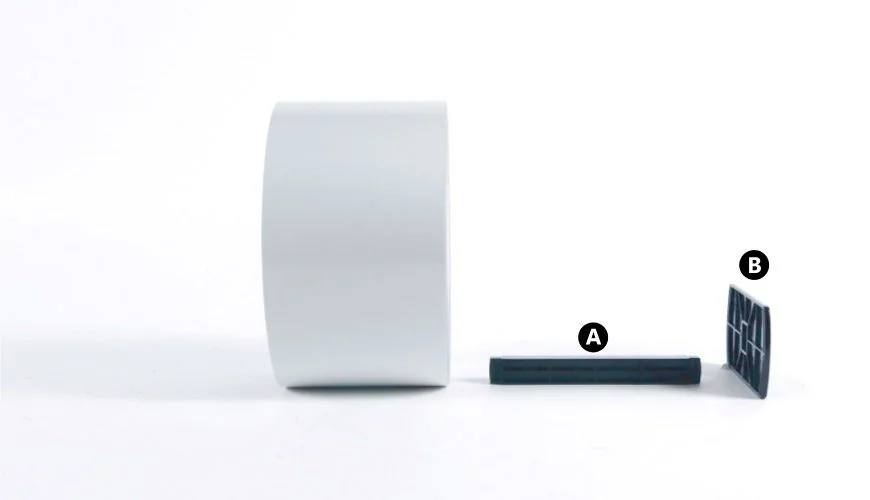
Rolls are mounted onto the media bar, which helps hold it and feed it into the print unit. It has two parts, a bar holder (A) and side guide (B) which fit onto the roll holder. To load a roll, simply slide it over the bar so that it feed from the top. Then fit the side guide onto the right hand side of the bar, ensure your roll butts right up against the guide.
Now that’s done, you can mount the media bar onto your roll holder.
Mount the Media Bar & Roll
Mount your roll onto the holder, just place the side guide on the right hand side and use the notches to line it up (A). Then simply push it down onto the holder. Once the roll’s in place don’t forget to check the sensor is still pointing to the white mark. Now you can ensure the reflective is guided through the print unit.
To set the media guide, pull the first panel forward and position it so it’s touching the fixed guide (B) on the left. Then slide the movable media guide (B) across so it is just touching the panel on the right hand side. Next it’s time to lower the print head and finish setting up.
Lower Print Unit & Setup Feed
Finish setting up by lowering the sensor arm and the print unit until it locks into place. Turn on the printer and then push the feed button on the control panel. This will feed the roll through the printer until it detects the notch at start of a panel. If everything is OK, replace your printers top cover and you’re ready for production.
Need Help?
This is a quick article on how to Use or Install CLS621 External Roll Feed on a Core XL printer. For further assistance, contact our tech support & customer service team for help. For ribbons, supplies or plate media for your printer, try our online NP-Shop – trade account required.
Note: Remember, for the best results clean your printers print-head regularly.

